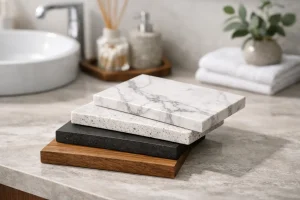
A countertop can look like the simplest decision in a kitchen renovation until cabinetry, appliances, plumbing, wall conditions, and slab selection all begin affecting the final result. This kitchen renovation stone planning guide helps you make those decisions in the right order, so your chosen surface supports both the way you live and the kitchen you want to see every day.
1. Start With How You Use the Kitchen
Before comparing quartz, granite, marble, quartzite, or sintered stone, consider what happens in your kitchen on an ordinary week. A household that cooks every night, hosts large family gatherings, or has young children may prioritize easy cleanup and consistent durability. A homeowner creating a statement kitchen may be more willing to choose a material that develops character over time.
There is no single best stone for every project. Quartz is a practical choice for many busy kitchens because it offers a nonporous surface and dependable color consistency. Granite brings natural variation and strong performance, while quartzite offers dramatic movement with the appeal of natural stone. Marble is valued for its distinctive veining and patina, but it requires an owner who is comfortable with more attentive care. Sintered stone can be an excellent option where heat resistance, UV stability, or a very contemporary look matters.
The right choice is the one that fits your maintenance expectations, cooking habits, and visual priorities at the same time.
2. Make Stone Selection Part of the Overall Design
Stone should not be selected in isolation. Cabinet color, flooring, backsplash tile, paint, hardware, and natural light all change how a slab reads in the room. A warm white quartz can look clean beside oak cabinetry yet appear yellow against cool gray paint. A heavily veined quartzite may become the centerpiece of a restrained kitchen, but compete with a patterned floor or busy tile.
Bring cabinet door samples, flooring samples, and a paint swatch to the showroom whenever possible. Look at full slabs, not just small samples. A sample is useful for confirming a color family, but it cannot show the scale of a vein, the density of movement, or the way a natural material varies from one end of the slab to the other.
This is especially important for granite, marble, and quartzite. Each slab is individual. If a particular section has the movement you love, that area can often be planned for an island, backsplash feature, or a highly visible countertop run.
3. Set a Realistic Budget Before Falling in Love With a Slab
The stone itself is only one part of the investment. A complete countertop project may also include removal of existing tops, sink and cooktop cutouts, edge profiles, seams, backsplash pieces, support for overhangs, delivery, and professional installation. Complex layouts can require additional fabrication time and more material.
A large island, waterfall panels, full-height stone backsplash, mitered edges, and book-matched slab layouts create an elevated finish, but they should be discussed early. They affect slab yield, fabrication requirements, and the project budget.
It helps to separate must-haves from upgrades. You may decide that a durable surface and a larger island are essential, while a full-height backsplash can be added only if the budget allows. Or the visual impact of a waterfall end may matter more than an intricate edge detail. Clear priorities make the selection process more efficient and reduce last-minute compromises.
4. Finalize Cabinetry Before Digital Templating
Accurate stone fabrication depends on stable, installed cabinetry. Cabinets should be secured, leveled, and in their final position before digital templating begins. Appliance specifications should also be confirmed, including the exact model of undermount sink, farmhouse sink, cooktop, range, and any pop-up outlet systems.
Even a small change in cabinet placement can affect a seam location, overhang, cutout position, or backsplash fit. This is why stone should be planned alongside the renovation schedule rather than treated as a final decoration.
At VE Stone, digital templating captures the installed kitchen dimensions precisely. Those measurements are then translated into CAD-guided fabrication drawings, allowing the fabrication team to plan cuts, cutouts, edges, and seams before the material goes into production. It is a detailed stage, but it is where a custom result starts to become dependable.
5. Plan Overhangs, Seating, and Supports Early
An island overhang can make a kitchen more social and more useful, but stone has structural limits. The amount of unsupported overhang that is appropriate depends on the material, thickness, cabinet construction, and how the area will be used. A short ledge for occasional seating is different from a deep breakfast bar where people may lean, climb, or place heavy items.
Support may be provided through steel brackets, hidden supports, corbels, or a designed cabinet structure. The best option depends on whether you want the support to disappear visually or become part of the design. Planning this before fabrication avoids visible add-ons and helps protect the stone from stress over time.
This is also the time to decide where stools will sit, how much knee clearance is needed, and whether the island needs an outlet. These small details influence the comfort and function of the finished space.
6. Treat Seams as a Design and Logistics Decision
Most stone countertops require seams, especially in larger kitchens, L-shaped layouts, long islands, or spaces with limited access. A seam is not automatically a flaw. It is a planned joint that allows fabricated pieces to be transported safely, moved through the home, and installed accurately.
The goal is to place seams where they are structurally practical and visually discreet. In a material with active veining, seam placement also deserves careful consideration because the pattern may need to be aligned as closely as possible. A fabricator can explain what is realistic for the selected slab and layout.
Access matters more than many homeowners expect. Narrow hallways, staircases, tight turns, elevators, and finished walls can determine the maximum piece size that can reach the kitchen. Discuss site access before fabrication, particularly for oversized islands or waterfall panels.
7. Choose Edges and Backsplashes for the Right Reasons
An eased edge is clean, versatile, and easy to maintain. A pencil edge creates a slightly more defined profile. More substantial profiles, including mitered edges, can make a standard-thickness slab appear much thicker and more architectural. The best edge is usually the one that matches the cabinet style and the level of detail elsewhere in the room.
Backsplashes deserve equal attention. A short stone backsplash is practical and familiar, while a full-height stone backsplash can create a cohesive, low-grout surface behind the range and along the perimeter. It works particularly well when the countertop material has beautiful movement worth continuing up the wall.
If you are using tile, decide where the tile ends and stone begins before measurements are taken. Outlet locations, range hoods, open shelves, and window trim all affect the finished layout.
8. Know What to Expect on Installation Day
Before installation, clear countertops, remove fragile items from nearby shelves, and create a clear path from the entry to the kitchen. Countertop pieces are heavy and require careful handling. Installation teams need working room to position slabs safely and make final adjustments.
After the stone is set, seams are joined, and sink openings are completed as specified, other trades may need to return. Plumbing connections are typically completed after the sink is installed. If a tile backsplash, paint touch-ups, or appliance trim work remains, coordinate those tasks around the countertop schedule.
Do not rush this stage. Proper installation is as important as material selection. Level surfaces, precise cutouts, well-finished edges, and carefully aligned seams are what make a custom stone project feel intentional rather than simply fitted.
9. Plan Care Before the Surface Is Installed
Each material has its own care requirements. Quartz generally needs mild soap, water, and a soft cloth. Natural stones may need periodic sealing depending on the material and finish. Marble and some other natural stones can etch when exposed to acidic foods, while all surfaces benefit from using cutting boards, cleaning spills promptly, and avoiding harsh or abrasive products.
Ask for care guidance based on the exact material you choose, not just the general category. Finishes, colors, and usage patterns can affect what you will notice over time. A well-informed care routine protects both the appearance of the stone and your long-term satisfaction with it.
A successful kitchen renovation is built from connected decisions: a material that suits your life, a layout that respects the slab, cabinetry that is ready for measurement, and fabrication that accounts for the details before installation day. Give the planning stage the attention it deserves, and your stone surfaces can become one of the most enduring and enjoyable parts of the home.